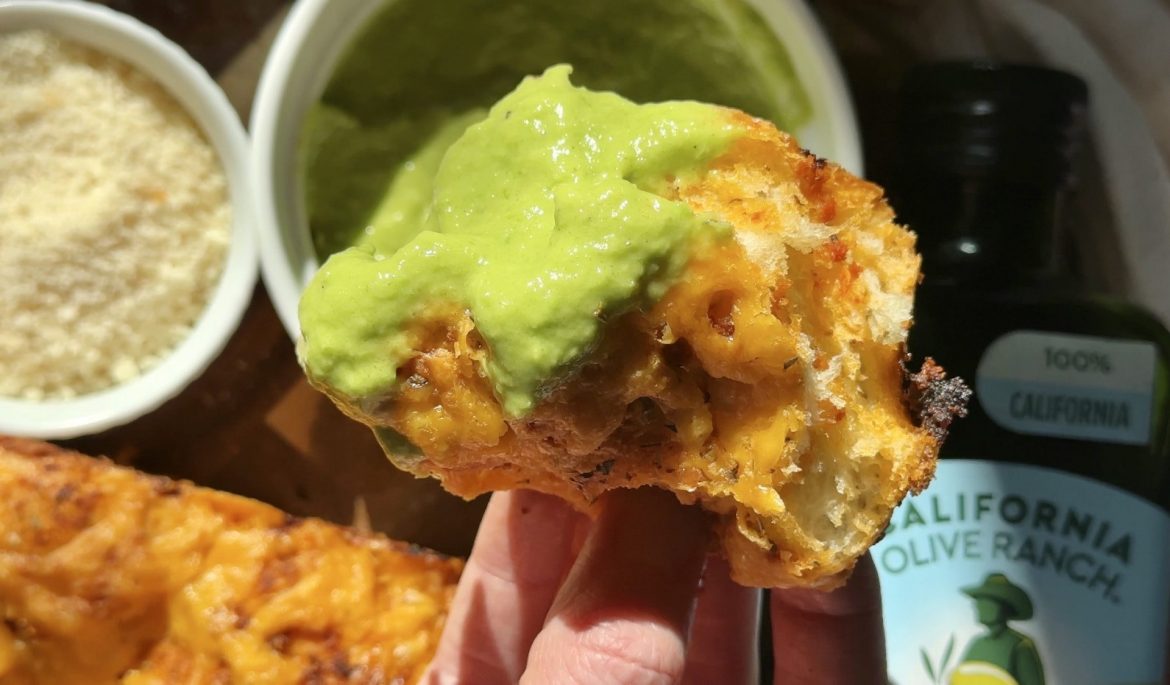


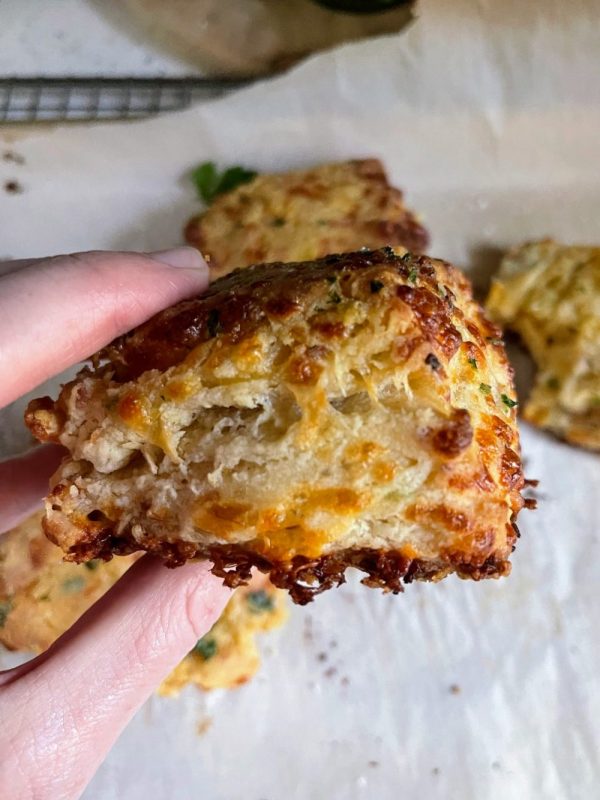
Crispy outside
Stuffed with fluff and lots of comfort

Buttermilk biscuits are my love language

- Buttery and fluffy
- Versatile and can be stuffed with different fillings
- Perfect on its own but even better as a breakfast sandwich
- Can be made in advance and frozen
What you need
Biscuits
- 3 cups all purpose flour
- 1/4 teaspoon baking powder
- 1 teaspoon baking soda
- 1 teaspoon salt
- ½ cup cold butter grated
- 2 1/2 cups grated sharp cheddar or white cheddar cheese
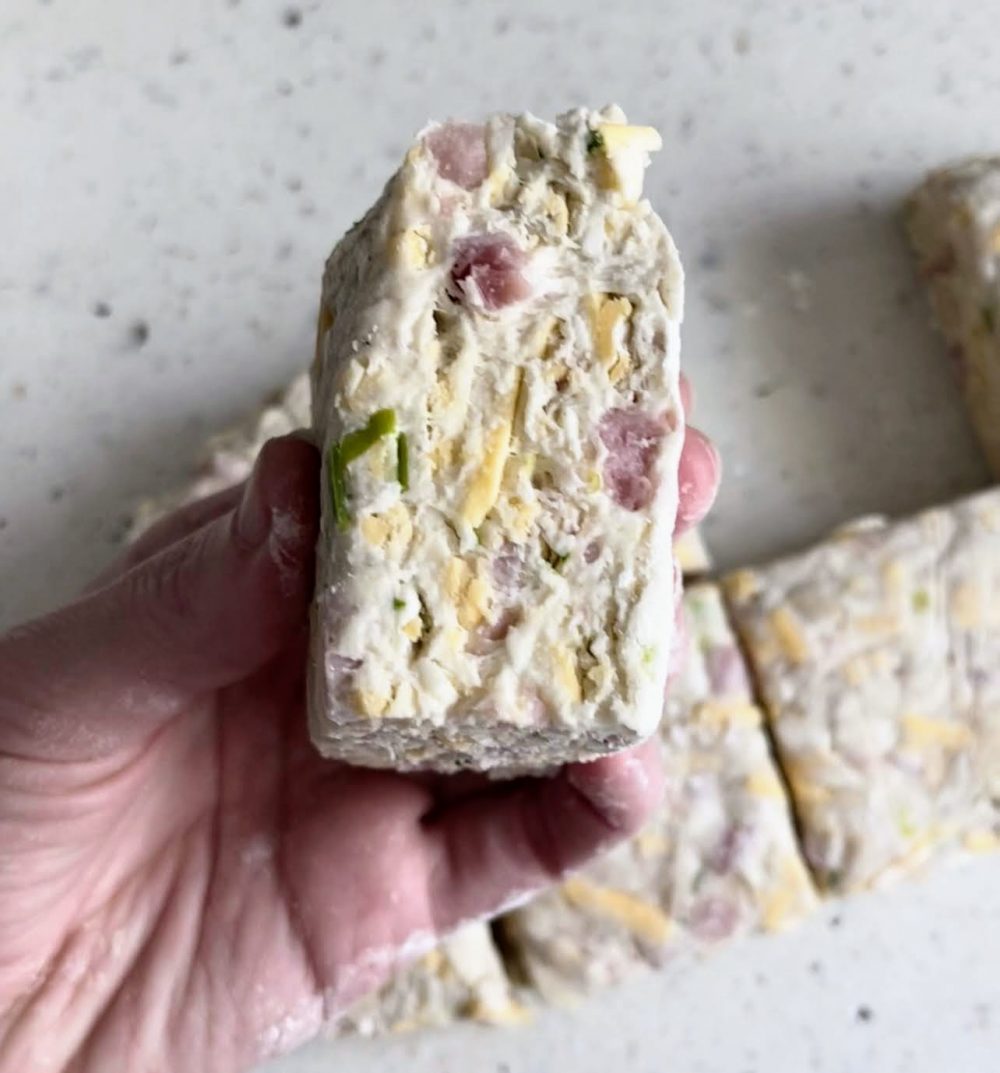
- 1 ½ cups chopped fully cooked ham
- 3 tablespoon fresh chopped green onions
- 1 cup full fat buttermilk
Garlic Herb Buttah
- 2 tablespoon butter melted
- Tsp of fresh chopped parsley
- Tsp of fresh chopped dill
- Pinch of garlic powder
- seasoned salt, to taste
What to do
1. In a large mixing bowl, mix together flour, baking powder, baking soda and salt.
2. Add the grated butter to the mix and make sure the butter gets coated with the flour.
3. Add ham, cheese and green onions, mix well until coated and even throughout.
4. Slowly add the buttermilk and begin tossing the dry ingredients in. Gently mix the dry ingredients until fully absorbed. It gets messy, but using your hands is the best method, because you can feel your way.
5. Slowly turn the dough onto a lightly floured non-stick surface. Gently knead the dough a couple of times just to bring it together.
6. Press or roll into a circle 1 inch thick. Cut the dough into thirds and then stack them on top of each other. Then roll out dough to 1 inch thick again. Wrap in plastic wrap and refrigerate at least 2 hrs. I prefer overnight! (see helpful tips below)
7. When ready to bake, preheat oven to 450 degrees. Cut dough into 12 equal sized square biscuits. Place biscuits 2 inches apart on a pan lined with parchment paper. Stick the pan in the fridge for 5-10 min, so the biscuits are extra cold.
8. For the garlic herb butter. Melt the 2 tbsp of butter, then mix in the herbs, garlic powder and salt. Brush the biscuits with the butter.
9. Bake for 16-18 minutes or until golden brown. The smell in the kitchen is so divine!
10. Serve while hot, and brush with more butter. Feel free to slice the biscuit in half and add whatever breakfast filling you prefer! Biscuits will last up to 3-5 days, and should be refrigerated. To reheat, place in oven at 350 for 15 min or until warm to touch!
Helpful tips
Here are some important Pro tips by Maude
- Biscuits should be chilled before baking! Thats how you get nice flaky layers!
- You can get creative with the fillings. Feel free to swap meat and cheese with vegan alternatives!
- Don’t skip the stacking and rolling process! If you have the patience to stack and then chill for 24 hours, your results will be so amazing!