

About This Recipe
I just love when two of my favorite things come together in one dessert! These Halloween Slutty Brownies are the ultimate festive treat. They are triple-layered, gooey, and probably over-the-top, but Im not sorry about it! I mean, just looking at them- they are screaming Halloween! These brownies start with a soft and chewy chocolate chip cookie base, then stacked with Oreos (I prefer the orange Halloween ones!) and topped with a fudgy brownie layer. But thats not all- this recipe goes one step further… a layer of Pillsbury Halloween sugar cookies baked right on top. I never thought I would enjoy anything alongside my Pilsbury sugar cookies, but I stand corrected. Together with the brownie, oreos and ccc base… I know it sounds like a lot, but I promise you- they all just work!
Key Ingredients
Unsalted Butter — I don’t use anything fancy here, except I do prefer unsalted over salted. Preferably melted for both the brownies and chocolate chip cookie base.
Dutch Process Cocoa — If you have access to dutch, I highly recommend using in this recipe! The color and flavor are richer and it helps produce the most luscious brownies. If you only have unsweetened cocoa powder, that will also work- the color and flavor just wont be as deep.
Dark Brown Sugar — Similar to the cocoa powder, I love the deep flavor from dark brown sugar but light brown also works just fine!
Granulated Sugar — I highly recommend getting a fine grain sugar- not coarse. This matters when mixing brownies. A finer sugar granule will dissolve faster and easier- creating that delightful crackly top on the brownies.
Cornstarch — I like using cornstarch in both the cookie base and brownies. I really think it helps keep both layers soft and tender. And this also means that the brownies will still taste fresh for more than just one day.
Oreos — Gotta get those orange ones! They also glow in the dark! But regular also works just fine!
Pilsbury Sugar Cookies — My favorite part! Use whatever characters you can find 🙂
FAQ’s
Helpful tips
Here are some important Pro tips by Maude
- Definitely use parchment paper with overhang so you can lift the whole slab out of the pan once cooled. This also makes slicing easier and cleaner.
- Once you add the flour in both layers, mix until just combined. Overmixing develops gluten, which can make your brownies cakey instead of chewy.
- For the brownie layer, using melted butter instead of creamed gives these brownies that dense, gooey texture. Let the butter cool slightly before mixing in the eggs to avoid scrambling them.
- Don’t overbake! The edges should be set, but the center can be a little gooey. A toothpick should come out with a few moist crumbs, not wet batter.
More Recipes!
Here are some more bar recipes you might enjoy!
If you try this recipe, I would love your feedback! Please leave a star rating, a comment below or on the reel in Instagram! Also please share what you made and tag @eatmaudes !! Thank you so much for stopping by and making yumminess with me!
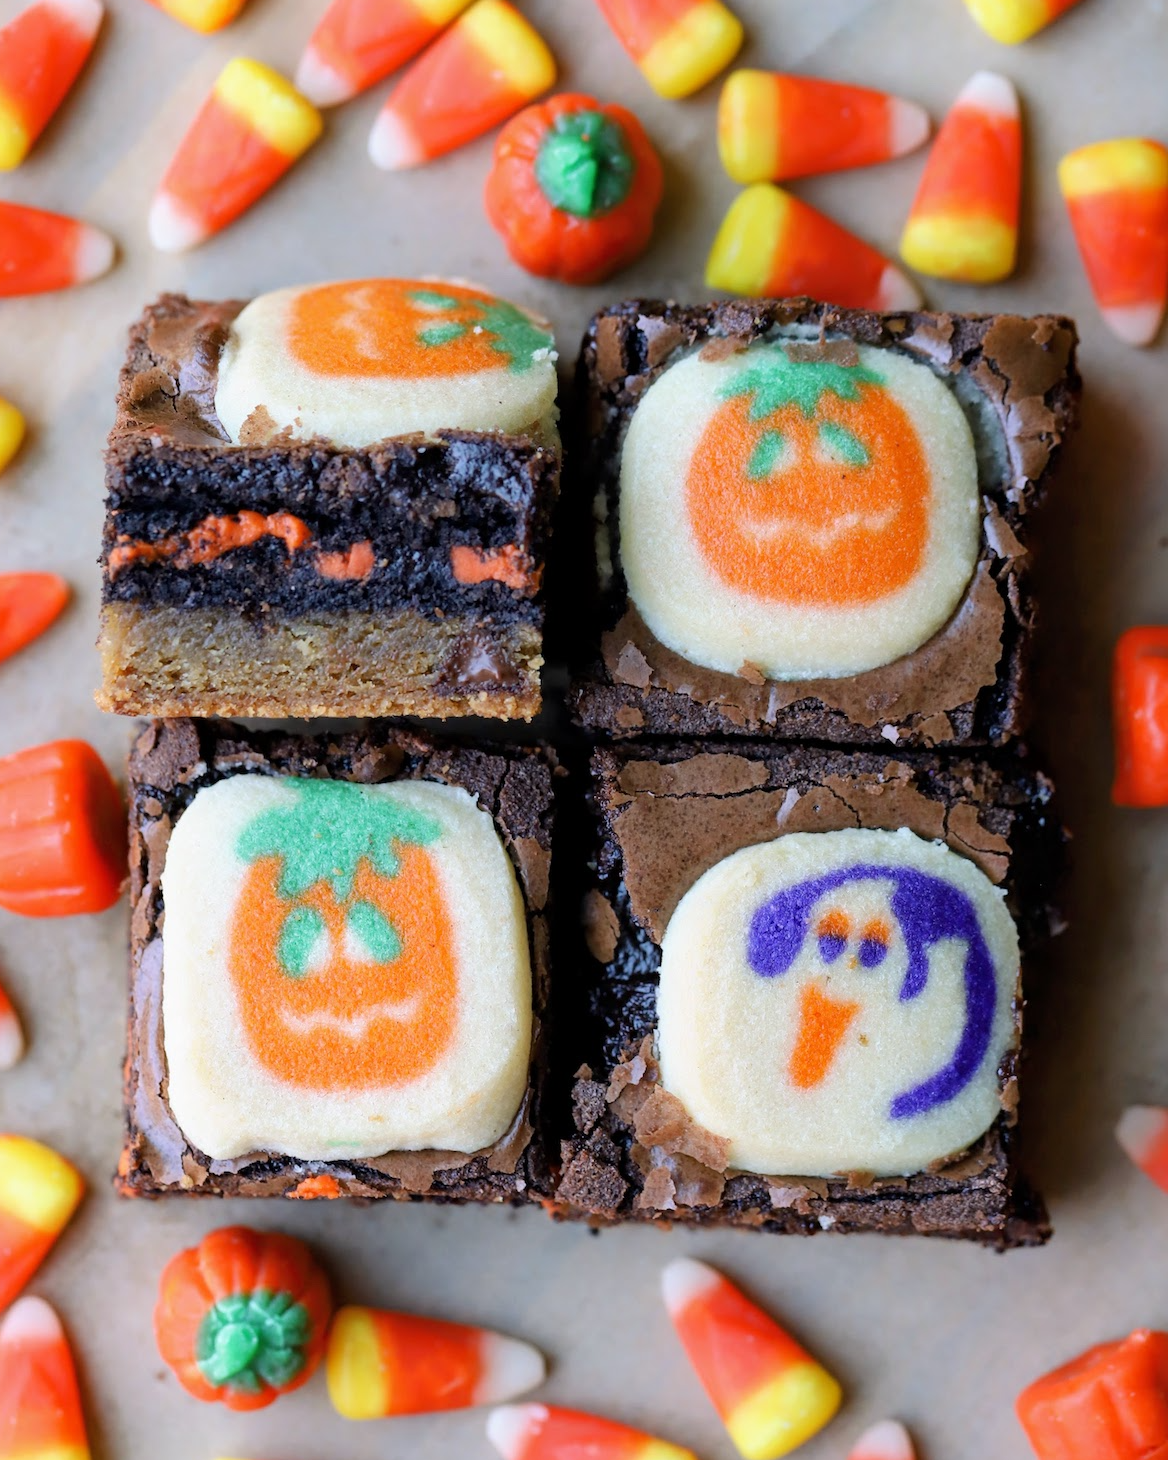
Slutty Halloween Brownies
Servings
**This post contains affiliate links. If you use these links to buy something, I may earn a commission at no extra cost to you
Ingredients
Chocolate Chip Cookies Base
- ½ cup (113 g) unsalted butter, just melted (not warm)
- 1/3 cup (75 g) granulated sugar
- ½ cup (110 g) dark brown sugar, packed
- ¾ tsp (3.75 ml) pure vanilla extract
- 1 large egg
- 1½ cups (188 g) all-purpose flour
- ½ tsp baking soda
- ⅛ tsp baking powder
- ½ tsp sea salt
- 1/2 tsp cornstarch
- 1 cup (170 g) chocolate chips
- 20 Oreos
Brownie Layer
- ½ cup (113 g) unsalted butter
- ⅓ cup (28 g) dutch process cocoa powder you can find here
- 1/4 tsp espresso powder (optional but I love the flavor boost from it!) you can find here
- 3/4 cup (175 g) granulated sugar
- 2 tbsp (25 g) dark brown sugar
- 1 large egg
- 1 large egg yolk
- 1½ tsp vanilla extract or vanilla bean paste
- ¼ tsp salt
- ½ cup + 1 tbsp (68 g) all-purpose flour
- ½ tsp cornstarch
- 1/4 cup (41 g) semi sweet chocolate chips
- 16 Pilsbury Halloween Cookies (or any festive sugar cookie will work!)
Instructions
Enable Step-by-Step Mode- Preheat oven to 350°F (175°C). Lightly grease and line a 9×9-inch baking pan with parchment paper, leaving some overhang for easy removal.
- For the cookie base, using a rubber spatula, mix together softened butter, granulated sugar and brown sugar until fully combined. Mix in the egg and vanilla extract until well combined.
- In a separate bowl, whisk together, cornstarch, all-purpose flour, baking soda, baking powder and salt. Gradually add the dry ingredients to the wet, gently folding and mixing until fully incorporated. Add the chocolate chips and fold until everything is homogenous. Press the cookie dough evenly into the bottom of the prepared pan. Place the pan in the fridge, uncovered while you prep your brownie layer.
- In microwave, (in a large heatproof bowl) melt unsalted butter. Once melted and still warm, add the cocoa powder and espresso powder (if using). Whisk in granulated sugar and dark brown sugar. Add the egg and egg yolk. Whisk vigorously until the sugars have dissolved some and the batter is light and slimy (About 2 minutes, take breaks if you need to. This step is important because it will help the brownies crinkle on the top!) :D. Add the vanilla extract.
- Add the all-purpose flour, cornstarch and salt. Gently fold everything with a rubber spatula, do not overmix.
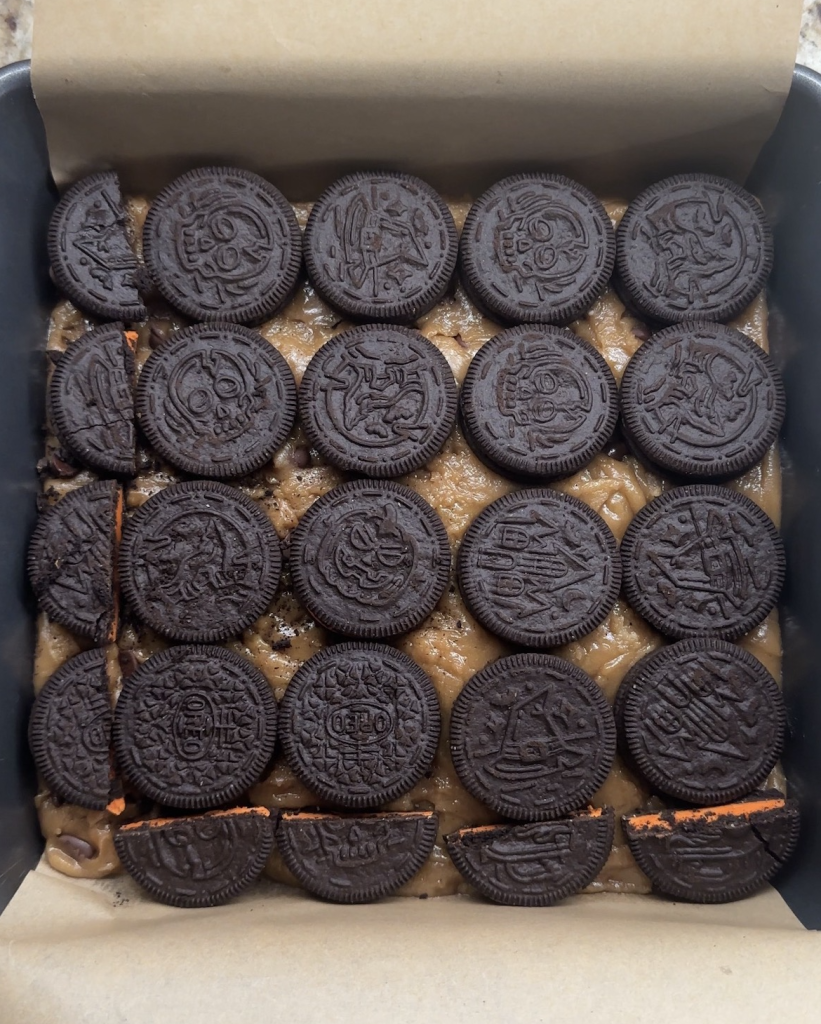
- Remove the pan from the fridge. Lay the oreos in a single layer on top of the cookie dough, gently pressing them in to slightly embed.
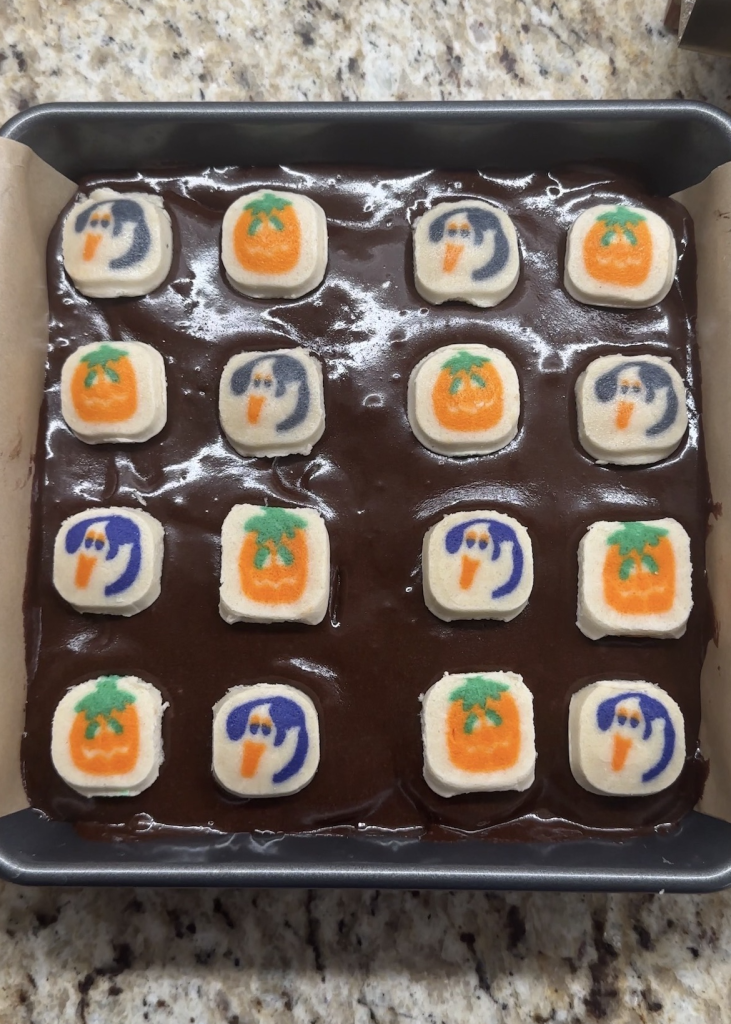
- Pour the brownie batter evenly over the Oreo layer. Gently press 16 Pillsbury Halloween sugar cookies on top of the brownie batter (space them evenly — they will spread slightly).
- Bake for 41-45 minutes, or until the brownie layer is set and a toothpick inserted into the center comes out with a few moist crumbs (not wet batter). If the top of the cookies are browning too quickly, loosely tent with foil during the last 10 minutes. Let the brownies cool completely in the pan before lifting them out and slicing. This will take about 1.5 to 2 hours. Lift, slice and serve!
One Comment