

FAQ’s
Helpful tips
Here are some important Pro tips by Maude
- When measuring the cake flour, you want to spoon the flour gradually into the measuring cup. Do not scoop and level (this yields more flour than you need). Spoon in flour and scrape/level the top with a knife.
- I highly recommend freezing your cake layers before assembling and frosting your cakes! This step not only makes the cakes easier to work with (less crumbs) but also creates a super moist and delicious cake.
- When cooking your raspberry jam, I like to pour the cooked jam in a bowl and then refrigerate for several hours or up to 1 day. This allows the jam to cool but also develop flavor!
- Add a generous layer of cream cheese frosting to your layers before creating the dam and adding your jam. The combination of cream cheese and raspberry is heavenly!
More Recipes!
Here are some more cake recipes you might enjoy!
Strawberries & Cream Crepe Cake
If you try this recipe, I would love your feedback! Please leave a star rating, a comment below or on the reel in Instagram! Also please share what you made and tag @eatmaudes !! Thank you so much for stopping by and making yumminess with me!
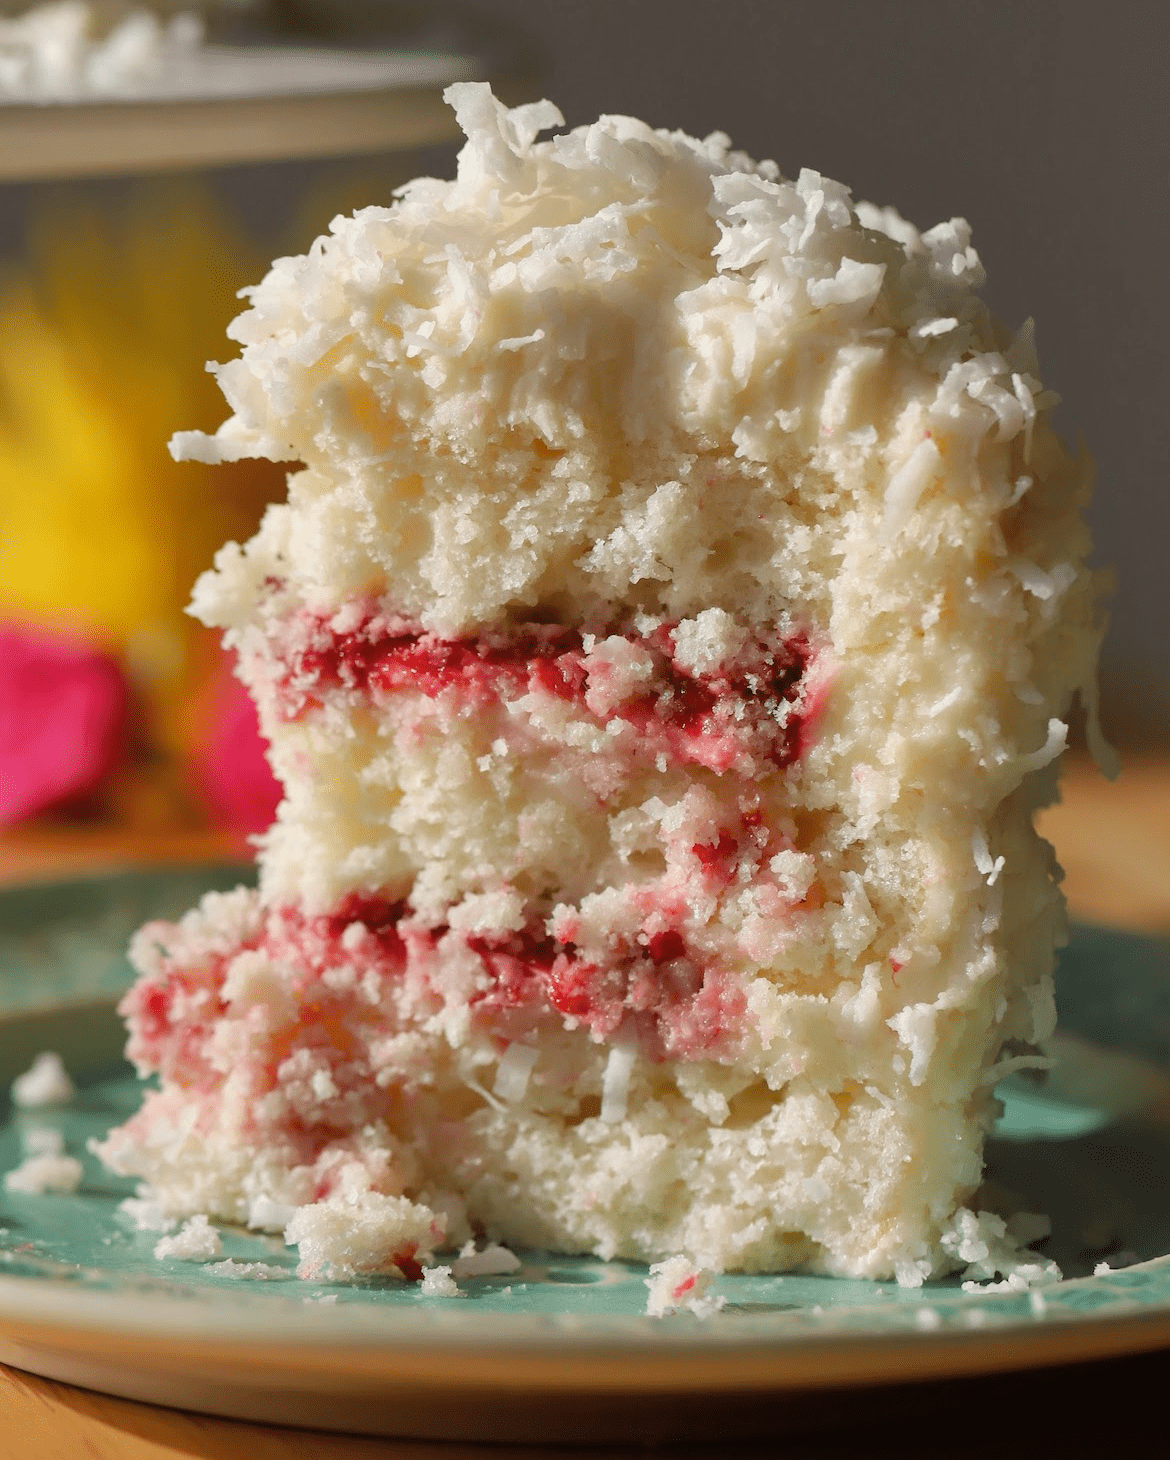
Coconut Raspberry Cake
Servings
10-12 slices
**This post contains affiliate links. If you use these links to buy something, I may earn a commission at no extra cost to you
Ingredients
Coconut Cake
- 1 1/2 cup (165 g) cake flour (*spooned and leveled, see note below)
- 1/2 tsp (2 g) baking powder
- 1/4 tsp (1.25 g) baking soda
- 1/4 tsp (1.25 g) salt
- 1 cup (200 g) granulated sugar
- 10 tbsp (140 g) unsalted butter, softened, room temp
- 3/4 cup (180 g) unsweetened canned coconut milk, room temp
- 2 tsp (10ml) coconut extract
- 3/4 tsp (4ml) vanilla extract
- 4 large egg whites, room temp
- pinch of cream of tartar
Raspberry Jam Filling
- 6 oz (170 g) fresh raspberries
- 1/4 tsp (5 ml) lemon juice
- 1/4 tsp (0.5 g) lemon zest
- 2 tbsp (25 g) sugar
- 1 tbsp (20 g) raspberry jam (I use Bonne Maman)
- 1 tbsp (8 g) corn starch
- 1 tbsp (15 ml) water
- pinch of salt
Cream Cheese Frosting
- 12 oz (340 g) cream cheese, softened
- 3/4 cup (170 g) unsalted butter, softened
- 1 1/2 tsp (7.5 ml) vanilla extract
- 1 3/4 cups (210 g) powdered sugar
- 1 1/2 cups (120 g) shredded coconut (i like to use sweetened!)
Instructions
Enable Step-by-Step Mode- Preheat oven to 325 F. Using a stand mixer with paddle attachment, cream butter, sugar and until smooth (about 90 seconds). Add vanilla and coconut extracts, mix until smooth.
- Sift all dry ingredients in a separate medium size bowl, set to the side. Be sure to shake your coconut milk well before measuring and pouring. I sometimes use my immersion blender to better mix the coconut chunks and water (to make it more cohesive). With the mixer on low, alternate pouring in the flour/dry ingredients and coconut milk in the butter and sugar. Mix until almost combined.
- In a medium size bowl, with a hand mixer (or stand mixer with whisk attachment works) begin whipping the egg whites and the cream of tartar. (I whip the whites at medium and then high speed). You want to have medium stiff peaks. You can test the peak stiffness by pulling up the handheld mixer out of the whites to see if the egg whites lift with the mixer AND if they stay in place (thats how you know!). Then, using a rubber spatula, gently fold the egg whites into the cake batter. Fold until the whites are fully incorporated into batter, we don’t want streaks of egg whites (this could take a few minutes, because you want to go gently and slow, please be patient).
- Divide batter (I use a scale to measure evenly) into three 6 inch pans that have been sprayed with cooking spray and lined with parchment paper. Before placing in the oven, give each pan a good tap on the counter (this helps with releasing air bubbles and to help even out the batter in the pan, and also an even bake). Bake all three cakes until a toothpick comes out with a few wet crumbs or clean, about 20-23 min. (Ovens vary, so keep your eye on the cakes. Baking could take less time.)
- When cakes are baked, let them cool and come to room temperature. I then like to wrap them in plastic wrap and freeze for a day or several (this makes for a cleaner frost job and, in my opinion, tastier cake!). If you are not freezing, let cakes cool completely, then run a knife along the side of the cake in the pan a few times to loosen. If freezing, wrap and freeze the cakes in their pans. When ready to frost, remove cakes from the freezer about an hour before assembly. Then flip the cakes onto a flat surface and pull the pan up and off (note: you make need to run a knife again to help loosen the cakes!)
- For the raspberry jam, over medium heat, add raspberries, lemon, zest, salt sugar to a medium size saucepan. Cook until raspberries break down, and then add your jam, cornstarch and water. (Note, I mix my cornstarch and water first in a small bowl, before pouring into the pan) Cook for another 5 minutes or until sauce has thickened. Remove from heat and then cool to room temperature.
- For the cream cheese frosting, using a stand or handheld mixer, beat butter and cream cheese. Add powdered sugar and vanilla. Mix everything until you get desired consistency.
- To assemble your cake, cut the top of each cake off so that the top is flat. (this will help with even stacking and frosting) Place your first cake disc/layer on a plate or cake drum. Spread a generous layer of cream cheese frosting and then with a piping bag, pipe a thick log like trail of frosting around the out perimeter of the cake. Spoon in half of the jam and spread out to the log. The log of frosting serves as a damn to keep the jam from spilling over (see video). Once jam is poured, top with another layer and repeat the process.
- Once layers are stacked, using an offset spatula knife (or rubber spatula is fine), begin frosting your entire cake. I start with the top, smooth out an even layer and then begin working around the sides. You can use a bench scraper to smooth out the sides and top. Frost job doesn’t need to be perfect as you will coat the entire cake with shredded coconut. For this, I start with spreading the coconut on the top of the cake, then go up the sides to get everything coated with the coconut. Refrigerate the cake until you are ready to serve. Cake should sit out for at least 1 hour before eating, this makes for the best texture! Store in an airtight container in the fridge for up to 4 days!
THANK YOU for sharing this recipe! My family and friends loved it. I forwarded the recipe video to a friend as well.
Hi Tanya! Of course! I am so happy to hear that you and your family/friends enjoyed! I love love love this one 🙂 Thanks for trying and also for sharing! It means a lot! Happy Baking!
I really want to try this yummy cake but, I cannot print the recipe so that makes it so difficult. It’s so long to copy. PLEASE make it printable.
Thank you for this ask! I am working on this feature with my team and it should hopefully be available sometime this spring! :-‘)
Very excited to make this tomorrow. Have you ever modified it for cupcakes?
Hi Robin- I havent, but that is a great idea! You could stuff the cupcake with the jam… 😀 Something to add to my spring baking list! Thanks for trying and I hope you enjoy!
i made this cake and it ended up being SO DENSE. i’m not sure where i went wrong here as i followed the recipe except doubled it so that it would fit in 3 9 inch pans. i baked until a toothpick came out clean and everything. only area i could find fault with is that i whipped my egg whites to stiff peaks (maybe over whipped) but i’m not sure how that would affect the texture this much.
Hi Brooke,
Oh no Im sorry to hear that it ended up being dense! It’s hard to say, since I cant see in person, but by the looks of the middle of the cake, you are correct, it looks like it might have been overmixed and didn’t rise properly. So a couple of things Ive learned when doubling cake batter- on paper it looks correct, but in real life, the outcome can sometimes differ (i hate to say it but it has happened to me a few times!)
A couple of things could have happened: baking soda is very sensitive — a tiny imbalance (extra acidity from coconut milk, uneven mixing) can collapse the structure in a cake that is supposed to be light and airy.
Overmixing can also cause a dense cake. Stiff egg whites can definitely change the texture of the cake. I know it sounds counterintuitive, but when you have stiff egg whites, the protein has tightened so much it can’t stretch in the oven, so instead of lifting the cake, it collapses and deflates the batter. If you mix longer (because of more batter) even with cake flour, gluten can develop which deflates the air from creamed butter and eggs which results in a tight crumb and heavier cake if that makes sense (i suspect that is what happened here!) One option would be to make two separate single batches instead of one giant one and divide gently into the three 9 inch pans. I will flesh out this instruction in the FAQ listed- Im sorry it didn’t provided better guidance, so I will improve that section.
I hope this helps! Thank you for taking the time to try this recipe and share your experience- I’m sorry the flavor and texture weren’t optimal.
Do you have a printable recipe for this cake? I’d love to print and try it.
Hi Tawnya! I am actually working on a “print recipe” option as we speak! It wont be ready for a couple more weeks but I will report back when its available! Apologies for the wait but thank you for asking!
That’s nice and thank you. A formatted printable recipe will be lovely. I have pulled it from the comments but it’s not clean.
that makes sense! Thanks for your patience- I will let you know when this feature is available!
We found it way too sweet. It’s a good recipe and the flavour combo is wonderful but unfortunately we just found it too sweet, and this is after reducing the sugar amounts (in moderation as I didn’t want it to affect the cake structurally). Other than that, cakes came out moist, with a nice coconut flavour. If you’re someone who doesn’t have a massive sweet tooth, maybe this recipe isn’t for you. I understand this
Hi There!
Thank you for making the cake and sharing your thoughts! I appreciate the honest feedback. Sweetness preferences can vary so much from person to person! If you found it too sweet, a few easy adjustments would be to leave the jam and sugar out of the filling entirely, or swap in unsweetened coconut flakes which would dial back the sweetness without affecting the structure of the cake. I hope that helps! Im happy to hear the moisture and coconut flavor came through! Thanks again — Maude